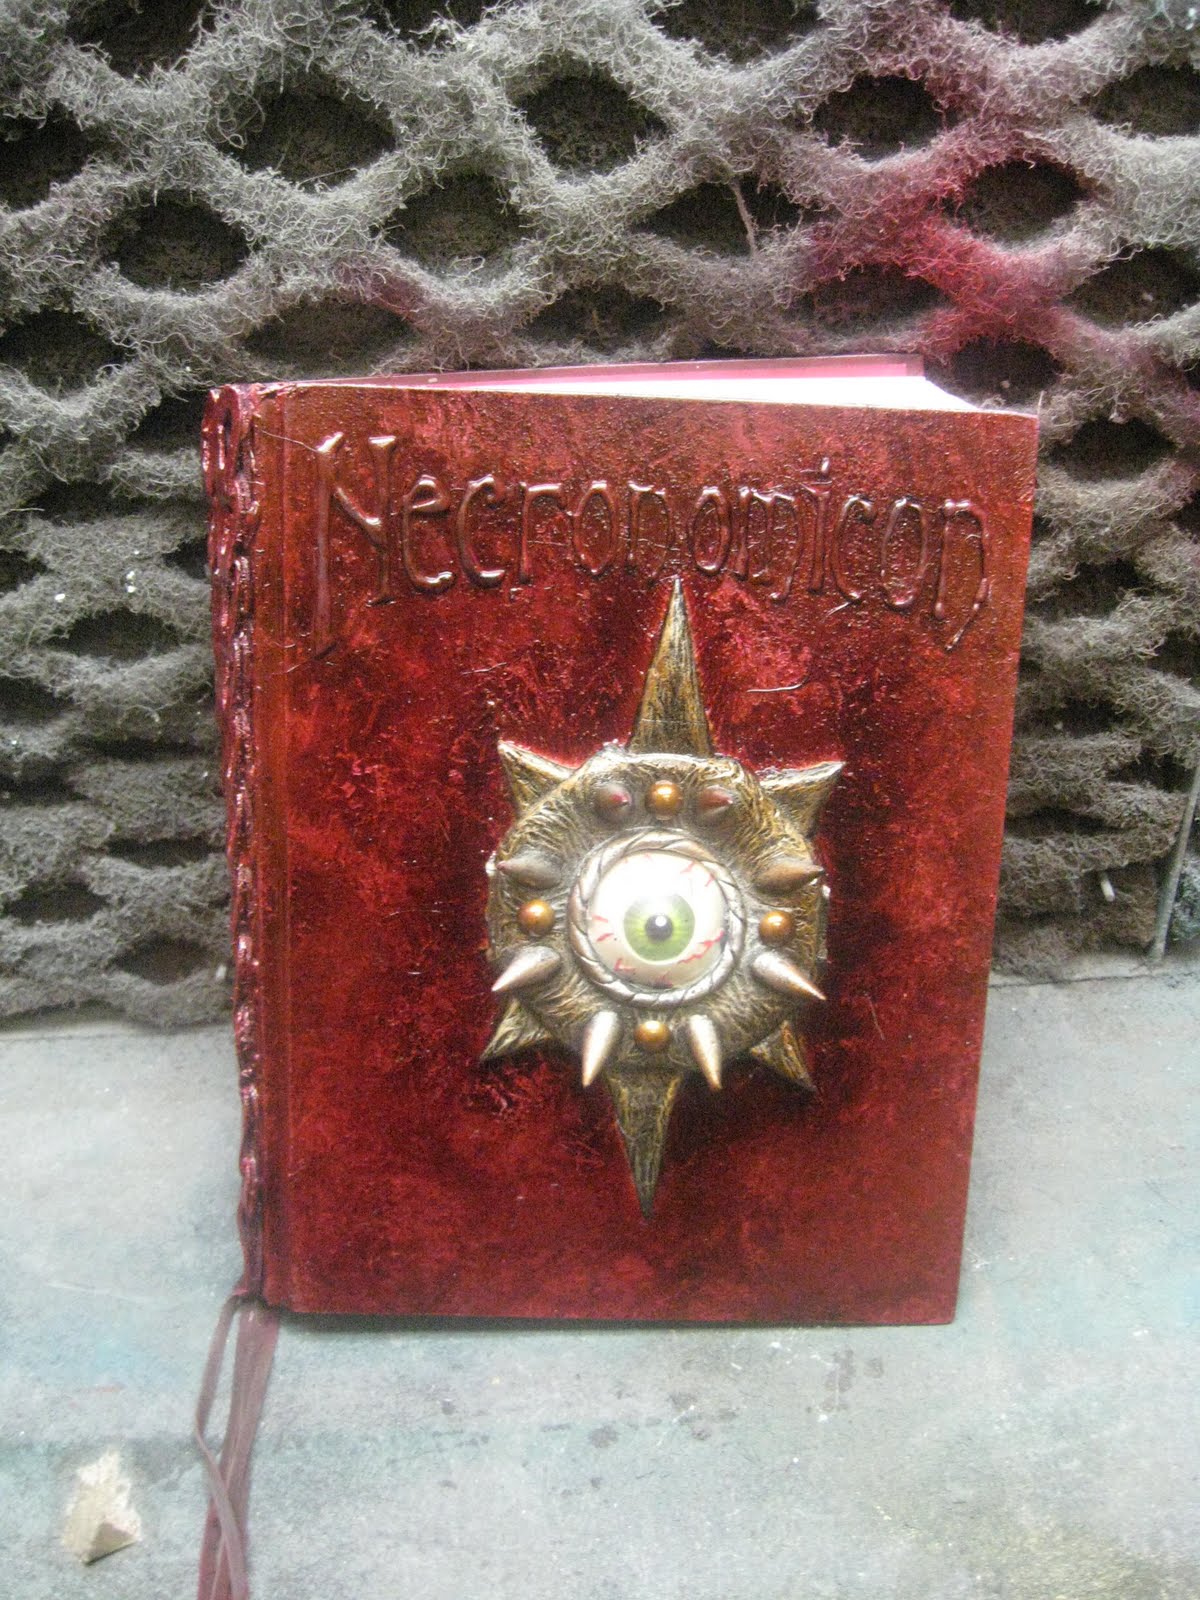
The Necronomicon Tutorial

This is a tutorial for changing the cover of a book, using found objects. Because most of the items were found kind of happenstance at a thrift store, I don't expect anyone to actually replicate this, rather to use the steps to create your own appliqued books
Many of the steps are covered in more detail on The Dragon Book Tutorial on this blog.
(Click on any of the pictures for a larger image)
1. Ingredients: This project came to be because of a fortuitous trip to the local thrift shop. I found a large book for $4.00, a rubber eye necklace for $.50 and an old "Hippy" belt for $1.00

2.Applique: For this step, I hot glued a portion of the Hippy belt to the spine, leaving the danglies in case I wanted to tie human finger bones or beads or stones into them later.

I also filled the medallion with hot glue to give it body as it was rather flimsy.

Then I applied the medallion to the book, also with hot glue. Because the medallion was made of rubber, it didn't take the hot glue very well, so I also nailed it to the book with four brass furniture brads. They look okay because I worked them into the design.

Step 3. Substrate: This step is covered in detail The Dragon Book tutorial. Do Not Skip This Step. I use either Jaxsan 600 or ViCryl, but I think Monster Mud would probably work if it were applied very thinly. Basically the substrat is used to give things a common texture so it will look uniform when painted.

Step 4. Layout: I picked an Art Nouveau font for this book because it seemed appropriate. I laid it out by counting the letters in the word, dividing by two, finding center on the book, starting in the middle of the word laying it out in both directions. That way the word is centered. I laid it out in pencil first then inked it with a sharpie.

Finished inking, now onto the next step.

Step 5. Raised Lettering: On the dragon book my daughter said I should do raised lettering, I didn't want to do it, but in between that book and this one, I decided I should try. After it was laid out and inked, I went over the inking with hot glue, trying very carefully to fill in all the black lines.

Done with the raised letters.

Step 6. Painting: This step is also covered in more detail in The Dragon Book Tutorial. I am fortunate to have a spray booth where I work, so I do my spray painting there and avoid toxic fumes. The first step is to base coat, and I did this with a red and a magenta spray paint. (note, I also taped out the eye medallion before I started to keep the paint from it.)

Then I did the spray and daub technique described in The Dragon Book Tutorial. The paint color I use for this is Design Master Glossy Wood Tone. It is sprayed on the book and immediately daubed off with a paper towel, leaving a very convincing faux leather look.
Step 7: Nailheads: The book didn't look finished to me, so I added some nailheads (brass studs that can be found in the craft area of most fabric stores) The nailheads look a bit bright here, but not to worry, they'll be knocked down in a later step.

Step 7: Metal Leafing: This step is also covered in greater detail in The Dragon Book Tutorial.
Applying the adhesive

Applying the metal leaf

Burinshing the leaf with a clean, dry brush

Leafing and burnishing done

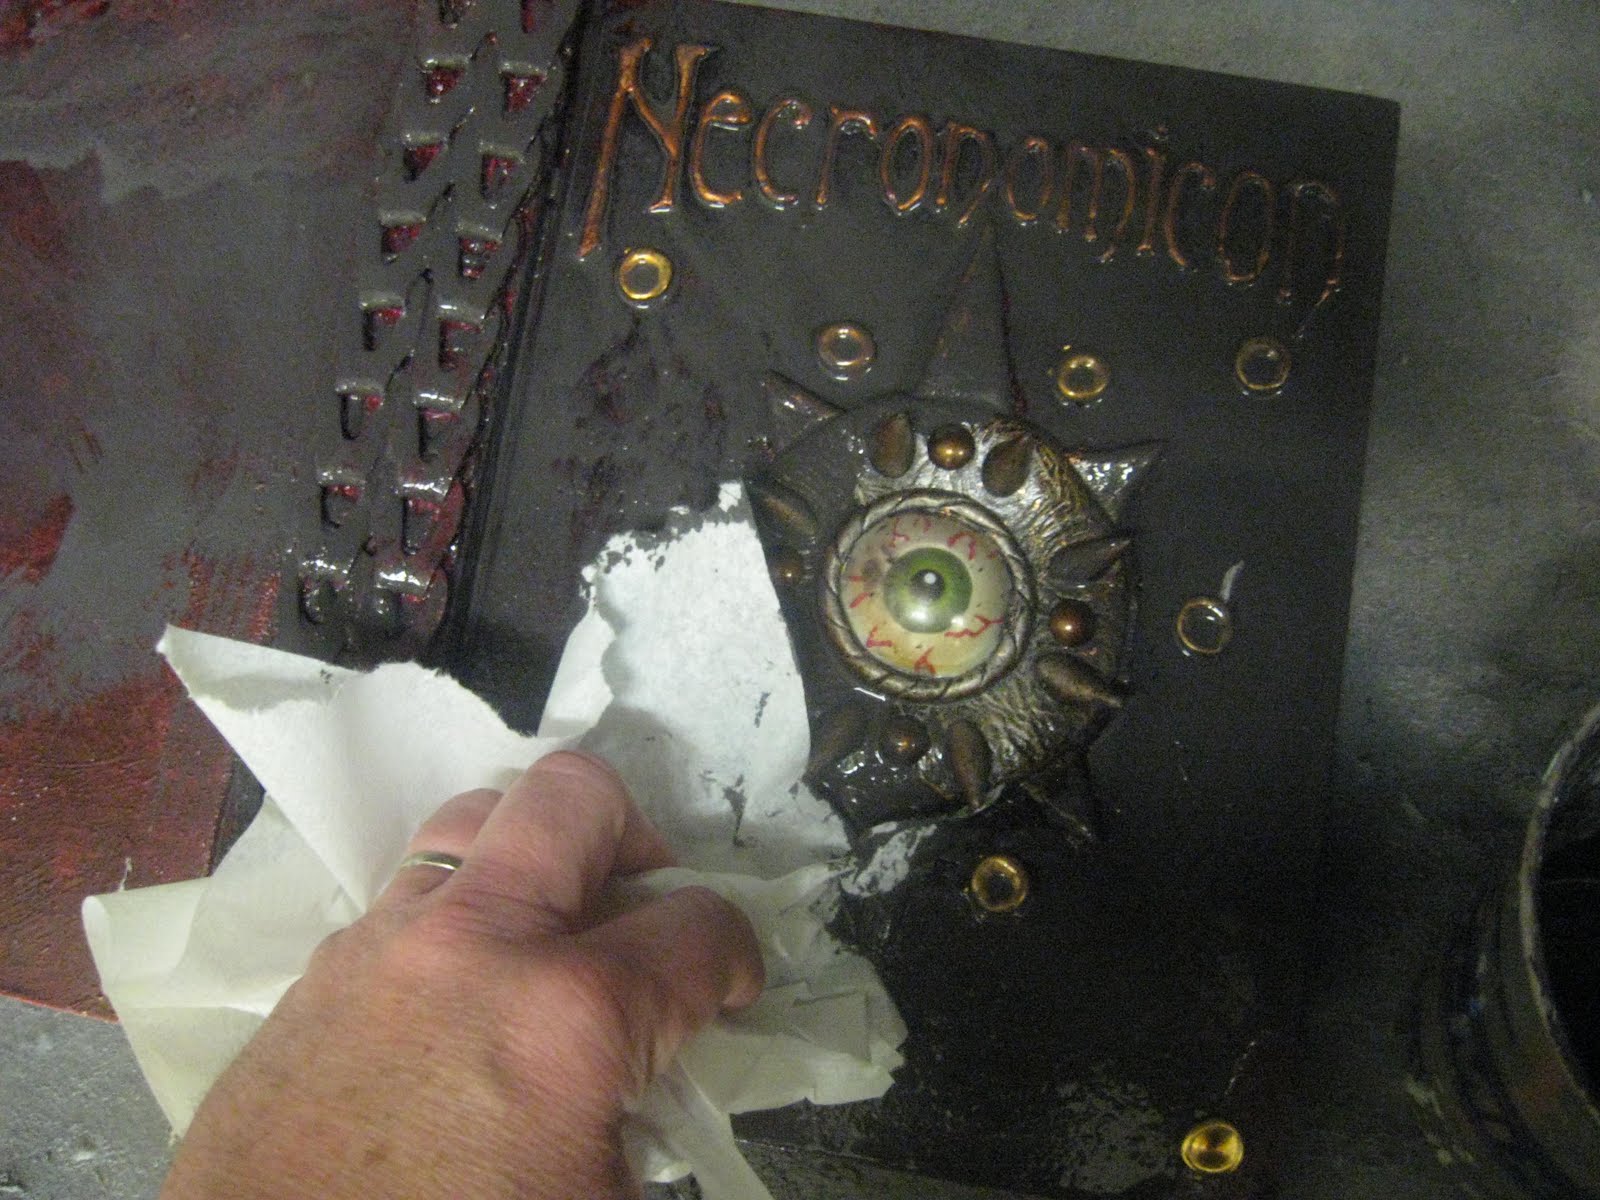
Step 8: Schmutzing: Actually, I really only posted this tutorial because I didn't have my cameral available when I did this step on The Dragon Book Tutorial.
If you have applied metal leaf and nailheads, now is the time to dim them with a light dusting of Glossy Wood Tone.
Schmutzing is one of the details that give the book an old look, a used look, a dusty look. It makes the book look credible. It's acheived by taking some dark brown junk paint and laying it out randomly on the book, and then immediately dipping your brush in water and watering down the paint you have just applied.

Oh Oh, this looks bad, doesn't it?

You can also use the paper towel to remove the wet paint from areas you don't wish it to be. This will also take the glossy appearance away from the Glossy Wood Tone. I think that is essential for a credible project. I also gilded the edges of the pages with gold spray paint, also in the technique described in The Dragon Book Tutorial.
After the Schmutzing is dry (and I always use a hair dryer to help me get it that way because I'm impatient), I like to add a bit of flat sealer because I don't like the way the Schmutz paint feels when I hold it.
Voila, the finished book!
1 comment:
This is amazing - thanks for posting your tutorial!
Post a Comment